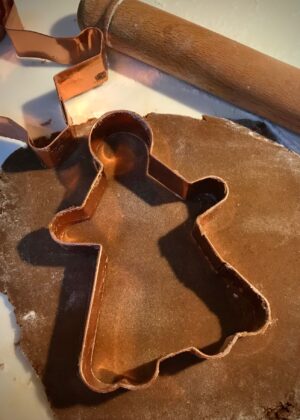
Shortbread Cookies for Decorating
This recipe is featured in The Edible Art of Decorated Cookies
Shortbread cookies hold their shape well when baked, making them an excellent choice for decorating. They are known for their buttery texture and simple ingredients. This recipe includes a white mint glaze that adds a cool, herbal flavor, perfect for creating a polished finish on each cookie. The glaze can also be tinted for custom designs, or the mint can be swapped out for flavors like citrus or almond, offering plenty of creative options. Whether for holiday cookie decorating parties or personalized gifts, these cookies provide a sturdy, tasty canvas for edible art.
Ingredients
For the cookies:
- 227 grams ( 8 ounces/2 sticks) butter, softened
- 57 grams (½ cup) powdered sugar
- 1 teaspoon vanilla extract
- 210 grams (1 ¾ cups) all-purpose flour
- 28 grams (¼ cup) cornstarch
For a mint-flavored white base glaze (or tint according to your whim):
- 227 grams (2 cups) or so powdered sugar
- 60 ml (4 tablespoons) or so half-and-half or milk
- ¼-1 teaspoon peppermint extract (or vanilla, almond, orange, rum, etc.)
Preparation
For the cookies
Line cookie sheet with parchment paper.
Place soft butter in a medium-size mixing bowl. Stir with a wooden spoon or sturdy spatula until smooth. Add sugar and vanilla. Mix together by hand for about 1 minute until fluffy and well blended.
Add the flour and cornstarch. Stir until flour is incorporated and the dough is shaggy. Turn out onto a lightly floured surface and press the dough in a ball. Knead a few times until fairly smooth, then form into a ball again and press with your hands into a flat disk. Chill dough, covered, until firm.
On a lightly floured work surface, roll out dough to about .6 cm (¼-inch) thickness. Too thin might not hold up well to handling during the decorating process. Keep the work surface, dough and rolling pin lightly dusted with flour. Cut desired shapes and place them on prepared pans. Chill. Re-roll scraps as many times as needed to use up the dough.
Place pans of cutouts in the refrigerator for at least one hour or loosely covered with waxed paper for up to 24 hours.
When ready to bake, preheat oven to 177°C (350˚F).
Remove cookies from the refrigerator and bake until just beginning to turn golden at the edges, 12-16 minutes. Rotate pans halfway through for even browning. Cool completely.
For the mint base glaze
Combine powdered sugar, half and half, and ¼ teaspoon peppermint extract in a medium-sized bowl. Mix until smooth. Add more sugar or liquid as needed to achieve desired consistency. The glaze should be thick but still pourable/spreadable. Add a little more half-and-half if too thick. Taste the glaze and add more extract if needed. Transfer the glaze to a shallow bowl.
To glaze the cookies, hold onto the edge and dip the top surface of the cookie into the glaze, ensuring all the surface touches the glaze. Draw the cookie straight up and out of the glaze, allowing excess to drip back into the bowl. Carefully flip the cookie right side up and allow the glaze to flow evenly over the surface. Repeat with remaining cookies. Allow the glaze to dry for 15-30 minutes. Longer is better. You now have a “blank canvas” ready to decorate each according to your theme and fancy.
Chef’s note
Decorated cookies freeze well for up to 3 months. Wait for the icing to set completely before layering between rumpled sheets of parchment paper in a freezer-friendly container. Thaw in refrigerator or at room temperature.


