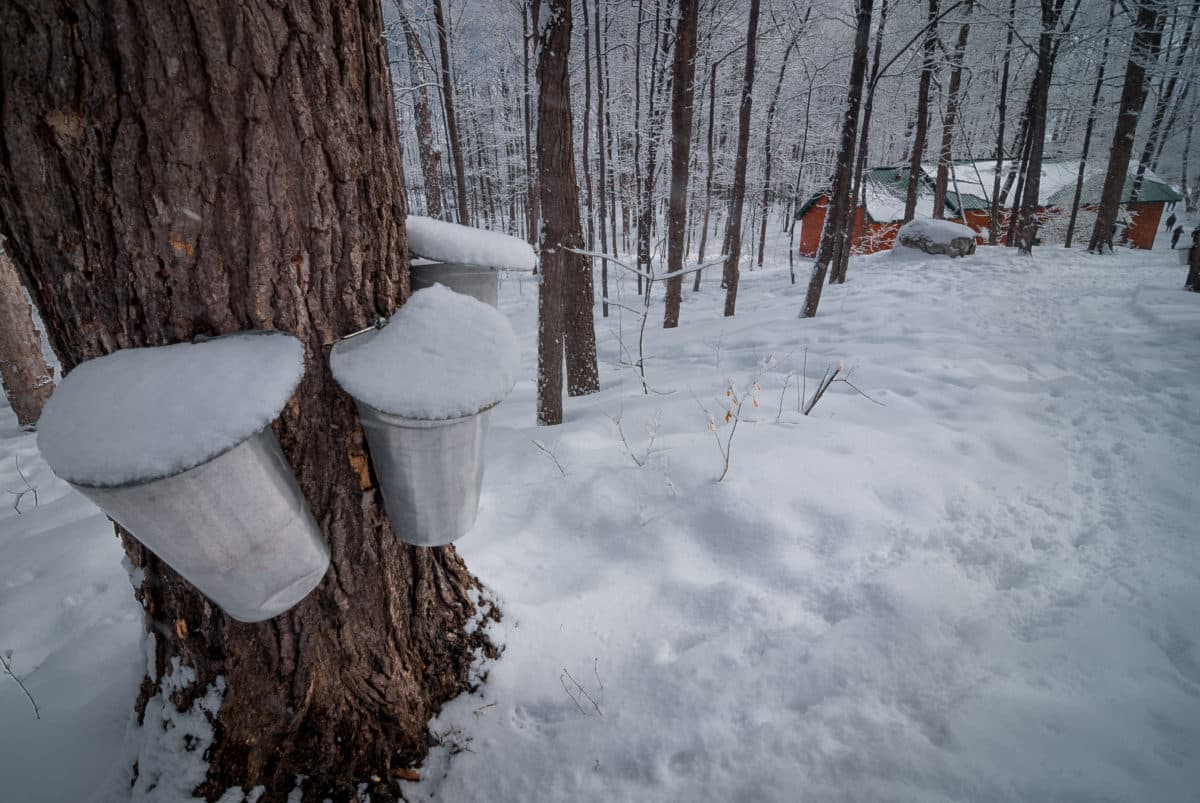
Driving the back roads of northern New England in the middle of winter can be a challenging endeavor. If you happen to come upon a bright sunny day when you are able to venture into wooded areas, pay particular attention to the trees as you drive along. You will likely soon notice a small bucket hanging from the occasional tree, or perhaps tubes connected to 5-gallon pails on the ground. You may even notice an entire network of white or blue tubing connecting dozens of trees together, all leading to a large container. These are all signs that the ‘sugaring season’ has started and the process of tapping the trees, collecting the sap, and then boiling it to make maple syrup, has begun.
No one knows for certain how long people have been making maple syrup. There are written records relating to maple sugaring in North America as far back as the mid-16th century. While advances in the equipment and process have been made, the basic sequence remains the same: gather sap from the tree and boil it until the water has evaporated to the point where it has a sugar concentration of approximately 66%. Maples are tapped in other regions of the world, as well as birch trees in Alaska, Russia and parts of Scandinavia. In South Korea, maple sap is consumed traditionally as a drink called gorosoe, rather than boiled into syrup. Quebec is the world’s largest producer of maple syrup, accounting for upwards of 70% of the world’s supply. Vermont is the largest producer in the United States.

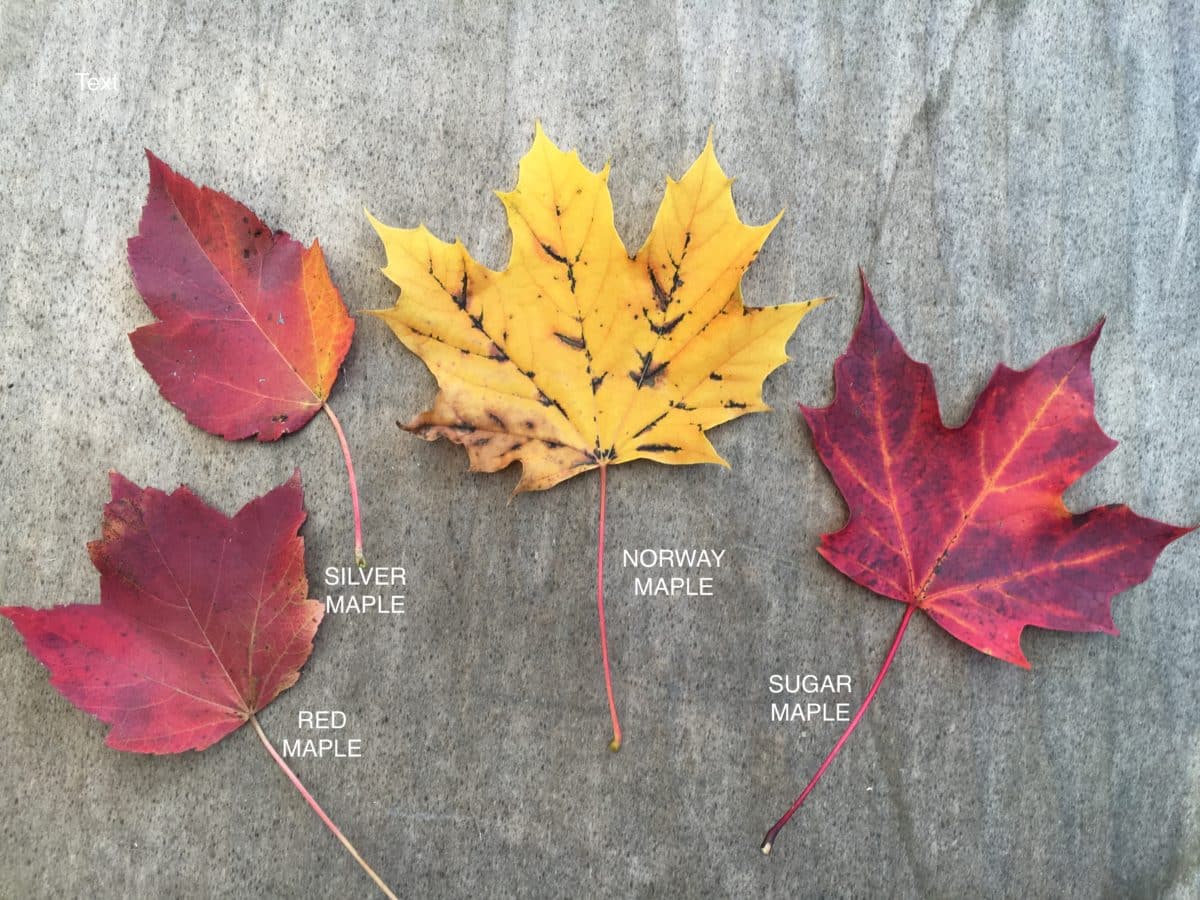
Making your own syrup is easy and fun. First you’ll need to identify the correct trees from which you can gather some sap. You’ll want Sugar Maples rather than the more widespread Red Maple or other maple species, because they yield the most sap. An examination of the leaves will easily distinguish them. A Sugar Maple does not have notches or a serrated pattern between the main points of the leaf, while Red Maple and Silver Maple do. Norway Maple lacks a serrated leaf edge, but can be separated from Sugar by the usually larger leaf, usually 7 (sometimes 5) main points rather than 3 or 5. The easiest time to find Sugar Maples is in the fall, as Sugar Maples are often the brightest in the forest, with a color range of green through yellow and orange to brilliant red on the same tree. Red Maples tend to be a muted red across the whole tree.
Making your own syrup is easy and fun. First you’ll need to identify the correct trees from which you can gather some sap. You’ll want Sugar Maples rather than the more widespread Red Maple or other maple species, because they yield the most sap. An examination of the leaves will easily distinguish them. A Sugar Maple does not have notches or a serrated pattern between the main points of the leaf, while Red Maple and Silver Maple do. Norway Maple lacks a serrated leaf edge, but can be separated from Sugar by the usually larger leaf, usually 7 (sometimes 5) main points rather than 3 or 5. The easiest time to find Sugar Maples is in the fall, as Sugar Maples are often the brightest in the forest, with a color range of green through yellow and orange to brilliant red on the same tree. Red Maples tend to be a muted red across the whole tree.
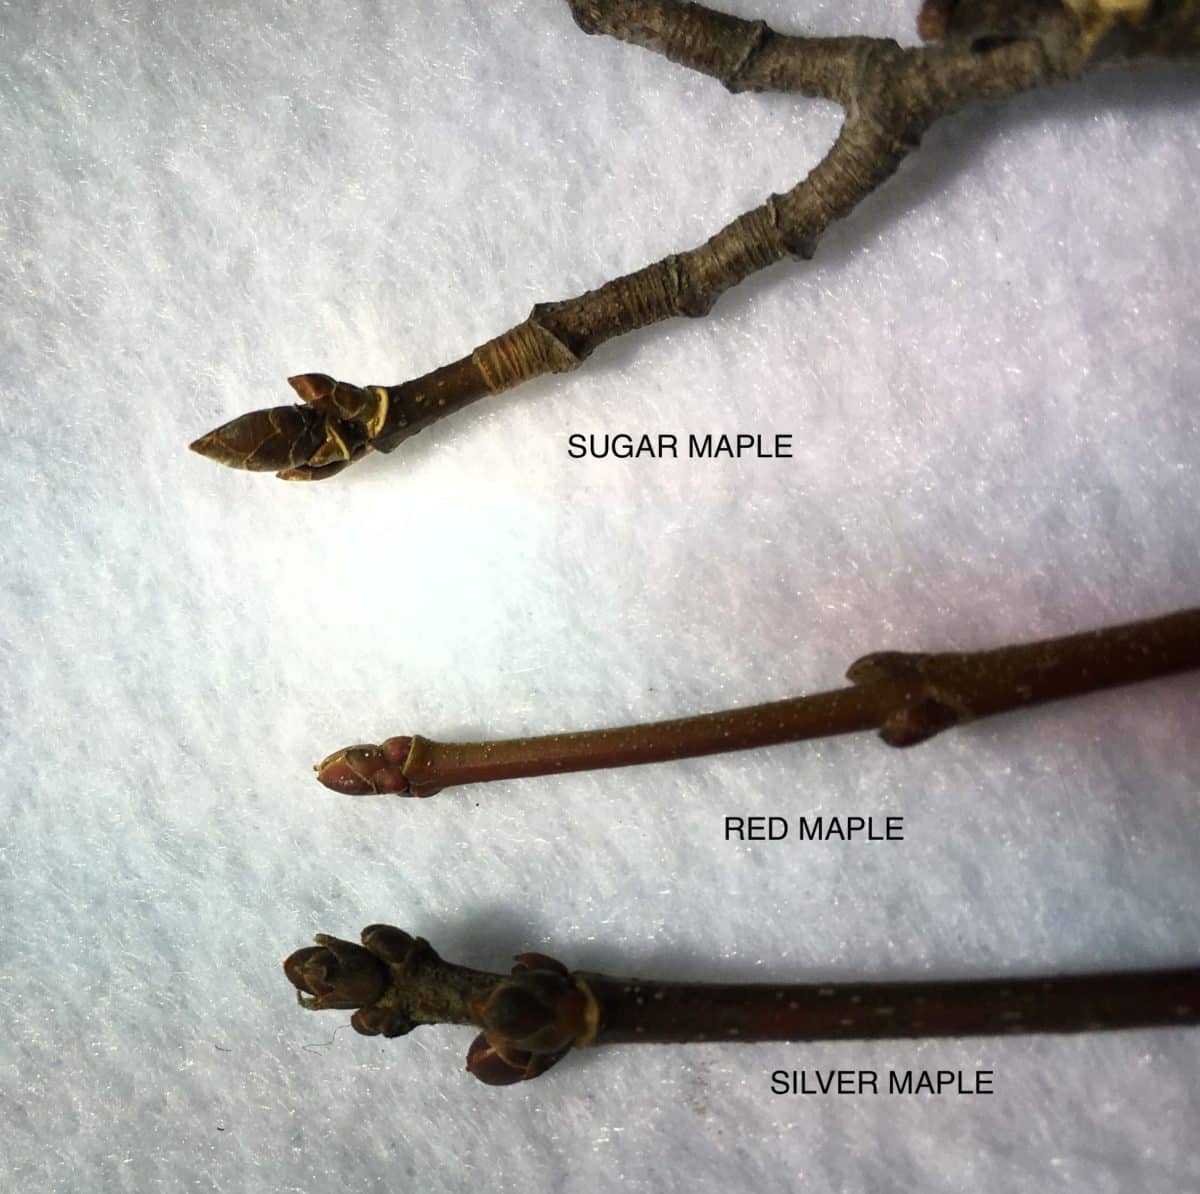
Without leaves, the identification is more difficult, but you can identify maple species in winter by the shape of their buds, with Sugar Maple having pointed buds and the others more blunt or round.

You’ll want to gather sap during the time the trees are leafless, so it’s best to identify and mark them when they have their leaves. When the trees are in leaf, the sap contains chemical compounds that create off-tasting flavors in the finished syrup. Sap flows through the xylem, the pipe-like vascular structure of the trees. Many of the tree species in the hardwood forest don’t have sap flowing during the leafless cycle at all. The few that do flow sap do so because of pressure forcing flow through the xylem caused by temperature changes in the stems between day and night, or pressure from the roots due to the warming of the soil in the spring. This narrows it down to just a few species to target. Maples are some of only a few species that flow based on the freeze/thaw cycles.

Trees have a range of sap sugar content based primarily on their species, but also dependent on their location, environment, and the time of year. Sugar Maples have the highest average sap sugar content, approximately 2-3%. At 2%, it takes about 40 to 45 liters of sap to produce 1 liter of syrup. Birch trees have much lower sugar content to the sap, requiring 80 or more liters to produce a liter of birch syrup.
To gather sap, you will need a drill, taps or spiles (spouts), and a method of collecting the sap. Sap can be collected by hanging a bucket from the tap or connecting tubing to the tap so it will flow into a bucket. Most taps today are 5/16-inch in diameter and designed to have less impact to the tree than older more traditional 7/16-inch taps. A drill bit with the tap diameter is used to drill a 2-inch deep hole at a slight upward angle and the tap is secured in the hole by striking it gently with a hammer. The bucket is attached, or tubing connected to direct the sap to a bucket on the ground. It is important not to tap trees with a diameter of less than 10 inches to avoid injury to the tree. A 20-inch tree can handle 2 taps spaced well apart and three or four taps can be used on truly large trees. When the days are sunny and slightly above freezing, and temperatures at night are below freezing, that is the time to start tapping.
The flow rate varies over the season, some days having little or no flow and other days overflowing the buckets. A large maple can flow 5 or more gallons of sap in a day. Collect your sap and keep it cold until it is time to boil. Sap can spoil at warm temperatures, and it is best to boil it as soon after collection as is practical.
Once you have the sap, it is time to boil it into syrup. While I’ve always wanted an expensive evaporator pan and stainless steel firebox (or “arch”) to do the boil, they can be quite expensive, easily reaching into the thousands of dollars. I started my first batch with a propane burner and a large stockpot. I’ve since upgraded to several stainless steel, deep, steam-table pans sitting across concrete blocks in a U-shaped configuration, open on one end to build and maintain a fire underneath. It takes longer to complete the boil than with the more expensive setup. The cost however, can be significantly lower. My current configuration, including the pans, was less than 60 dollars. If you already have a large stock pot and heat source, your cost to get started could be very little.

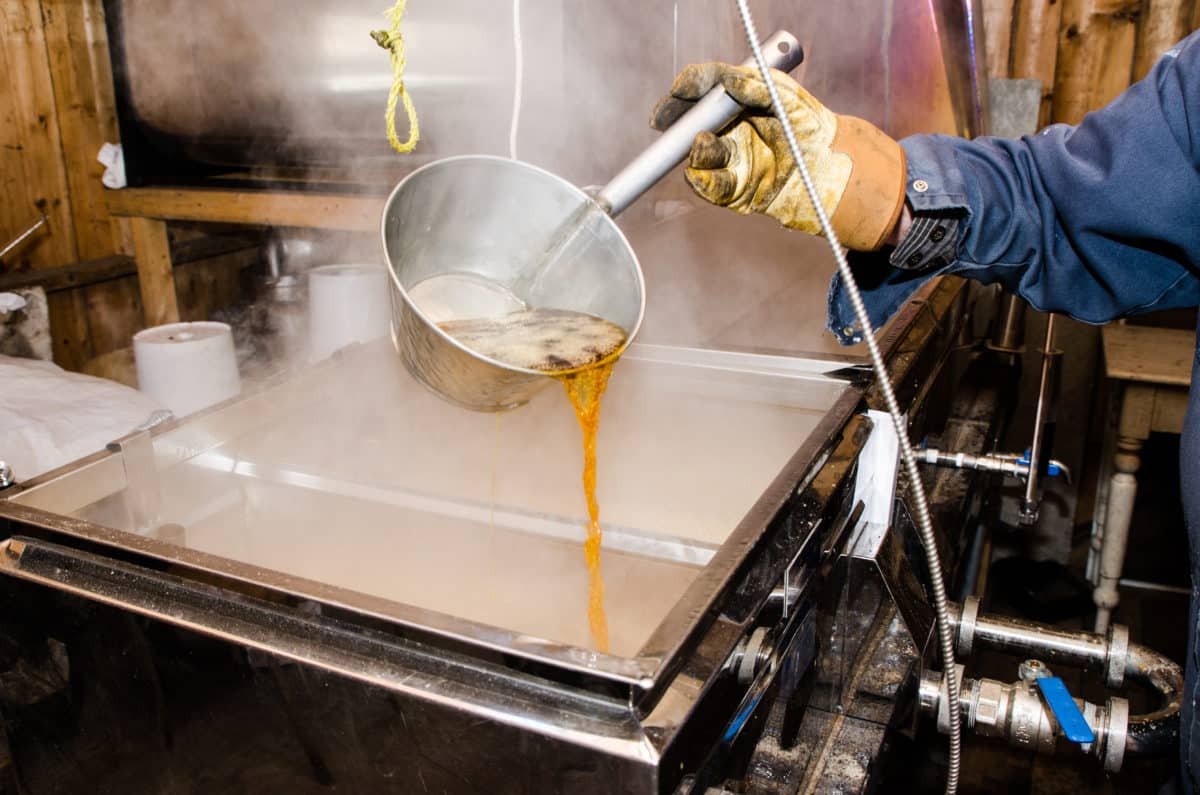
Your goal is to achieve around 66% sugar in syrup. This can be measured using a refractometer, specific gravity or temperature. At 66%, the boiling temperature will be about 7.5 degrees above the boiling point of water. The liquid will be quite thick, and care must be taken as the sugar content rises not to let it bubble over or scorch. The process proceeds very rapidly as you approach 50% and higher sugar levels. The syrup will also darken into a golden color as it boils down. A good rule of thumb is that when it reaches a light golden color, it is time to start monitoring temperature or sugar levels. When I reach around 50% sugar, I usually will move indoors and finish the last part of the boil on the stove, in order to have better control. You don’t want to get too far from the target sugar levels, as anything above 67% will be hard to keep from crystalizing.
The sugar from maple sap is almost entirely sucrose. During the gathering and processing some of the sucrose is converted to invert sugars by breaking apart the sucrose molecules. This happens mainly through microbial fermentation and increases with temperature, so higher levels of invert sugars are typically present later in the season. These invert sugars result in different flavor profiles through the boiling process and are a major contributor to the complexity of flavors found between syrups. The final color and flavor profile is also influenced by caramelization of the sugars as well as the Maillard reaction. The Maillard reaction occurs when the invert sugars react with amino acids in the sap during the boil. Each batch of sap is slightly different according to the degree to which these chemical processes occur. The Sugar Maple Research and Extension center at Cornell University has reported that over 300 different flavor compounds have been found in maple syrup. Birch sap contains only invert sugars, primarily fructose and glucose, and results in quite different flavors as it is boiled into syrup.
Once you reach the target sugar content, but while the syrup is still hot, you should bottle it. Syrup bottles can be any sanitized food-grade container. If using jars or bottles, sanitize them and pour the syrup into them. This should be done at or above 82°C/180°F, the bottles capped and inverted to cool. Some people use the water bath canning method to bottle their syrup. You can also filter it before bottling, but this step is not absolutely necessary. In most years, mineral compounds that precipitate out during the boiling process create a ‘sugar sand’ sediment in the syrup. This will settle to the bottom of your containers, but in clear bottles or jugs will detract from the overall clarity or presentation. For small batches, syrup can be clarified by squeezing it through coffee filters into containers. For larger quantities, wool or orlon filters are best. It is also possible to bottle syrup, let the sediment settle, then transfer the syrup into a pot to reheat to over 82°C/180°F before re-bottling.
So, if you live in an area that has a population of maples, or even birch, look for sugaring taps, spiles, and buckets at the local hardware store or online. It may give you a new perspective on the transition of winter to spring. ![]()
